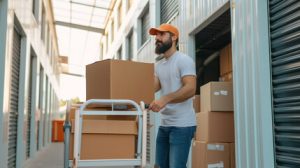
Deck Repair Services

How to Use Beams and Joists in Deck Building

Before you build your deck, check with local building authorities to find out what setbacks and permit requirements exist for raised decks. Also, learn the location of your property line so you don’t accidentally build over it.

Deck Building

Focus on characters and a gold engine, and be sure to include some type of locations for your character engine. Avoid attachment hate and location hate, too – these can wreak havoc on your overall win percentage. Contact Deck Builders Murfreesboro TN for professional help.

In the world of building, beams are structures that primarily resist loads applied laterally across their lengths. Beams are commonly associated with structural engineering, but any structure that requires lateral support can benefit from the use of a beam. These structures include buildings, machine frames, automobile components, and more.

When it comes to deck building, beams are an integral component in creating a safe and sturdy structure that can withstand the load of people and furniture. When properly designed and built, a deck’s beams can help create an open-concept space while maintaining its structural integrity. Beams also provide a critical role in deck-to-post connections, distributing weight throughout the deck and preventing stress from being concentrated on any one area.

To ensure your deck’s beams are strong and safe, they must be sized correctly to handle the weight you’ll place on them. Incorrectly sizing your beams can lead to sagging, which reduces the deck’s lifespan and safety. To avoid this, be sure to follow the manufacturer’s guidelines and check your local building codes when determining beam span requirements.

There are a few factors that determine how far a beam can safely span, including the type and size of lumber used, its strength, and the weight it must carry. Beams made of stronger wood types or higher-grade lumber can often span longer distances without sagging. In addition, the length of joists placed between each beam should be considered when calculating beam spans. Longer joists increase the amount of weight a beam must support, and not factoring this in can result in under-sized beams that aren’t up to the task.

In addition to choosing the right wood type and size, you must also install blocking in a zigzag pattern between joists to prevent them from shifting under pressure. Blocking should be installed every 4′ to 6′ in a zigzag pattern. It’s also a good idea to use metal connectors when connecting the beams to the posts to further increase the strength of your deck’s frame. This will not only prevent bending and twisting, but it will also keep your deck safe from the effects of a seismic event.

Joists

Joists are the structural elements that support your deck’s frame and boards. They’re responsible for carrying the weight of your deck, furniture and other items placed on it, as well as the pressure of foot traffic. The joists span outward from the beams, which distributes the weight to a large area rather than one single point. Joists are typically made from timber, such as a treated softwood that’s preservative-treated for ground contact and rated to Use Class 4.

The joists are spaced evenly apart, which helps prevent excessive stress or deflection over time. A joist is also built with a deeper cross section, which allows it to carry a greater amount of weight before buckling or failing. Joists can either be nailed directly to the deck’s ledger boards or fastened to the concrete foundation using structural screws.

When it comes to joists, bigger is better. Having more of them means that your floor or ceiling will be able to handle heavier loads without sagging. For the same reason, larger joists require more material and are more expensive than their smaller counterparts.

In addition to their load-bearing capacity, joists must also be durable and weatherproof. This is especially important for decks in coastal regions, where exposure to the elements can cause them to rot or damage over time. To ensure that your deck is safe and stable, make sure to perform regular inspections of the frame and all components.

There are different types of joists, depending on the needs of your project. For example, some joists are shaped to match the slope of your deck, which can be useful for projects with a shallower slope. Similarly, some joists are designed to be used as beams for porches or balconies.

Joists are often installed with blocking, which is pieces of lumber or a wood block that’s installed between joists. This is essential to the anatomy of a deck, as it provides additional stability and prevents twisting or movement over time. It also distributes the load evenly across multiple joists, which can help to reduce sagging or warping of your deck over time.

Posts

Posts serve a dual purpose in deck construction: they transfer the weight of the deck and anything on it (people, furniture, snow) to the ground and help prevent sagging or structural failure. They’re typically made of treated lumber, although steel supports are sometimes used for higher decks.

A deck’s load requirements, design, and where it’s built will determine post size. Posts sit under the deck beams and connect to concrete footings that are sunk into the ground. The larger the deck’s load requirement, the taller the posts need to be.

Ideally, a post should be made from pressure-treated southern yellow pine. It should have a label that states it’s suitable for ground contact and should be pre-treated to minimize the risk of termite infestation and wood rot. A quality deck builder will know the exact size and type of posts required for a given project and install them correctly. Using a post level, the builder can check that each post face is plumb before installing.

Spacing between support posts is also an important consideration. Too far apart, a deck will sag; too close, it’ll require extra diagonal bracing and may fail under load. Check with your local building codes and consult a span table to determine the maximum distance between post locations, depending on joist size and span and deck height.

Screw Pile

A foundation is one of the most important parts of any structure, and a deck is no exception. Without a strong foundation, even the most impressive building can crumble in a heartbeat. Using screw piles for your deck can ensure that your foundation will be durable and long-lasting. Screw piles are also more resilient to weather-related damage, like freezing temperatures and storms, than concrete.

Screw piles are also easier to install than concrete foundations. When it comes to deck building, time is money, and having a system that saves you time can help reduce costs and increase productivity. Unlike poured concrete, screw piles don’t require time to set or cure, so you can start building your deck as soon as the piles are installed. This is especially helpful in Winnipeg, where the temperature can drop drastically in the winter and it’s not possible to pour concrete at all during that period.

How Do Screw Piles Support a Deck?

Screw piles, also known as helical piles in the north, are an efficient and cost-effective foundation option for your new deck. They are long, steel shafts that have helixes at the top, and they are rotated into the ground by earth-moving machinery. They can be anchored into various types of soil, and their design is flexible to accommodate different load requirements.

Unlike traditional drilled piles, screw piles are designed to penetrate deep into the ground. They bypass soft soil top layers and anchor into firm ground beneath, ensuring that your foundation will be strong and stable for years to come. They also distribute your building’s weight over a larger area of the ground, so it’s less likely to sink or move over time.

Another benefit of screw piles is that they are more environmentally friendly than drilled or driven piles. The process of installing a screw pile involves less digging and muck-away than drilled or driven piles, so it reduces the environmental impact of your project. Screw piles also have a lower embodied energy and work well in a variety of soil conditions, which makes them an excellent choice for remote sites.

Tree Services

The Art and Science of Modern Tree Removal

Worcester Tree Removal requires careful planning to ensure safety and efficiency. Every tree has unique characteristics that affect how it is cut. Proper assessment prevents property damage and injury. The process is both technical and strategic.

Tree Removal

Modern tree removal begins with a thorough inspection. Professionals evaluate trunk stability, root spread, and surrounding structures. They also check for disease or decay that may complicate removal. Accurate assessment guides every next step.

Safety is the highest priority during tree removal. Protective gear, ropes, and barriers reduce risk. Falling branches are controlled to prevent accidents. Planning the drop zone is critical before cutting begins.

Some trees are removed due to disease or infestation. Insects, fungi, or viruses can compromise structural integrity. Removing affected trees prevents spread to healthy plants. Early intervention maintains overall landscape health.

Urban tree removal requires special attention. Buildings, power lines, and sidewalks create additional hazards. Planners must account for these factors before any cuts. Precision prevents costly damage in crowded areas.

Equipment has evolved for safer, faster removal. Hydraulic lifts, chainsaws, and stump grinders are commonly used. Some jobs require cranes for large or precarious trees. Technology reduces labor while improving accuracy.

Tree removal is not only about cutting but also disposal. Debris must be safely removed or recycled. Wood can be repurposed for mulch, firewood, or furniture. Proper handling supports sustainability in landscaping.

Environmental considerations are crucial in removal decisions. Planners assess the impact on soil, wildlife, and water flow. Removing trees without strategy can cause erosion or habitat loss. Thoughtful planning balances human needs with nature.

Some trees are removed to make way for construction. Driveways, extensions, or utilities may require clearing. Professionals coordinate with builders to minimize delays. Strategic removal ensures both safety and project efficiency.

Pruning and trimming sometimes serve as alternatives. Selective removal of branches can relieve stress on weak trees. This extends the tree’s life while maintaining safety. Not all trees require full removal.

Root removal is an essential aspect of the process. Remaining stumps can sprout new growth or attract pests. Grinding or chemical treatments prevent regrowth. Proper root management ensures a clean, stable site.

Season affects tree removal planning. Winter may make soil firmer, reducing ground disturbance. Summer may allow faster drying of cut surfaces. Timing impacts both safety and efficiency.

Large trees require sectional removal for safety. Professionals cut branches and sections from the top down. This prevents sudden falls that could damage property. Careful sequencing protects both crew and surroundings.

Tree removal can increase sunlight and airflow. Clearing dense canopies improves conditions for remaining plants. It also reduces mold and moss growth on nearby surfaces. This creates healthier landscapes.

Planning includes assessing nearby structures and vegetation. Avoiding accidental damage to neighboring plants is part of the strategy. Professionals measure angles and distances precisely. Every cut is deliberate.

Some trees are removed to prevent future hazards. Leaning trees or those near power lines pose risks. Removing them proactively avoids emergency situations. Prevention is often safer and cheaper than reaction.

Permits are sometimes required for large or protected trees. Regulations ensure removal does not harm public spaces or ecosystems. Compliance protects property owners from legal issues. Professionals guide clients through these requirements.

Tree removal can improve aesthetics. Overgrown or dying trees may detract from landscaping design. Clearing them enhances sightlines and overall harmony. Gardens and yards feel more organized and inviting.

Some removal projects involve emergency response. Storm-damaged or uprooted trees need immediate attention. Quick action prevents additional property damage. Response teams prioritize safety and rapid clearing.

Tree removal can also intersect with wildlife management. Birds, squirrels, or other animals may inhabit trees. Professionals check for nests before cutting. Humane relocation ensures ecosystem balance.

Advanced techniques include rope-assisted cutting and crane lifts. These methods allow removal in tight or sensitive areas. Controlled lowering of branches prevents accidental impact. Technology increases both safety and efficiency.

Some trees require special disposal due to size or contamination. Treated wood, diseased material, or chemical exposure must be handled carefully. Proper disposal prevents environmental hazards. Responsible management protects soil and water.

Community spaces often require selective tree removal. Parks and playgrounds need safe and open areas. Removing unsafe trees improves public enjoyment and reduces liability. Planning balances safety with natural beauty.

Tree removal may involve soil restoration afterward. Ground left exposed can be compacted or eroded. Professionals prepare soil for new planting or turf. Proper restoration prevents long-term landscape issues.

Cabling and bracing can delay the need for removal. Weak trees may be reinforced to withstand stress. This technique supports growth while reducing risk. It is a proactive alternative to cutting.

Weather conditions affect removal decisions daily. High winds or rain make cutting dangerous. Professionals monitor forecasts to schedule safe operations. Safety protocols adapt to natural conditions.

Tree removal services are expanding with green initiatives. Wood chips, mulch, and logs are repurposed creatively. This reduces landfill waste and promotes sustainability. Every stage considers environmental responsibility.

Cost considerations include tree size, location, and complexity. Larger, urban, or hazardous trees require more labor and equipment. Clients plan budgets with expert consultation. Pricing reflects both risk and resources needed.

Some removals involve historic or heritage trees. Decisions require expert assessment and permits. Preservation efforts may guide partial removal instead of total cutting. Careful handling respects both history and safety.

Tree removal is also part of disaster preparedness. Overgrown or weak trees increase risk during storms. Removing them reduces potential damage to structures and people. Communities benefit from proactive planning.

Seasonal changes can influence tree health. Removing weakened trees before winter prevents snow or ice damage. Timely action keeps yards and streets safe. Professionals advise based on growth cycles.

Planners often coordinate with landscape designers. Clearing trees allows better design and planting plans. Removal is integrated into broader aesthetic and functional goals. Collaboration improves both safety and beauty.

Some trees require chemical treatment before removal. Pests, fungi, or rot may be managed before cutting. This prevents spread and protects nearby vegetation. Treatment ensures safer and cleaner removal.

Tree removal can support infrastructure projects. Roads, pipelines, and utility lines often require clearing. Coordination prevents delays and ensures safe progress. Planners balance efficiency with environmental care.

Professional arborists also consider long-term land stability. Removing large roots or trees affects soil composition. Experts advise on erosion prevention and replanting strategies. Proper planning maintains safe, stable grounds.

Tree removal may involve environmental mitigation. Replanting or creating buffer zones offsets ecological impact. Sustainability is increasingly part of project planning. Responsible removal balances human and natural needs.

Education is a part of tree removal services. Professionals inform clients about timing, risk, and maintenance. Knowledge empowers property owners to make informed decisions. Awareness reduces hazards and improves outcomes.

Advanced machinery allows tree removal in challenging terrains. Hillsides, urban alleys, and rooftops require specialized equipment. Machines enhance safety while reducing manual strain. Innovation keeps crews efficient and secure.

Tree removal is more than cutting wood; it is strategic planning. Safety, environmental care, aesthetics, and logistics all intersect. Each project requires expertise and foresight. Modern tree removal is both science and art.

Gutter Services

Gutter Installation and Downspouts

Gutter installation is an essential part of protecting your home’s foundation and reducing water damage. To properly complete gutter installation, downspouts must be located in the correct locations to direct water away from the house and into safe zones.

The timeline of gutter installation can vary depending on a number of factors, including the size and intricacy of your roof structure. Choosing a reputable and experienced professional is the best way to ensure a quality gutter installation that safeguards your home. Visit https://allamericangutterstc.com/ to learn more.

Gutter Installation

Gutter systems safeguard homes from water damage, protecting foundations, basements and lower levels of the home from flooding. Professional gutter installers assess a homeowner’s roofline to determine the appropriate slope and dimensions for a custom gutter system. They carefully select materials and install them, ensuring a watertight fit. They also place downspouts at key points to ensure proper drainage. Gutter systems prevent water infiltration from the roof, preventing costly damage and mold growth. They also prevent overflowing downspouts that can cause flooding, and they divert stormwater to yard drains for safe disposal.

Gutters are easy to buy at home centers and full-service hardware stores, but installation is a labor-intensive process that requires a great deal of attention to detail. The best gutter installation companies use a team of professionals to tackle the project quickly and efficiently, saving homeowners time and money. They have extensive experience working safely at heights, and they follow precise guidelines set by the manufacturer to qualify for warranties.

External factors significantly influence the timeline for gutter installation, including weather conditions. Unexpected rainy or windy weather may delay the project or require a halt in work for safety reasons. A reputable contractor will communicate openly with the homeowner to create a realistic timeline that takes these factors into account.

Albany homeowners face unique challenges when it comes to gutter installation, with the Capital Region’s seasonal leaves and heavy snowfall requiring careful planning for efficient drainage. Experienced gutter contractors understand the local building requirements of historic districts and varying housing styles to protect properties from floods, leaks and other issues. They can adapt their gutter installation techniques to accommodate these nuances, providing homeowners with a custom solution that safeguards their homes for years to come.

Slope

While a gutter’s slight angle may seem imperceptible, it plays a huge role in how well your gutter system works. This slant is what creates the proper amount of pressure to move rain and melting snow downward toward downspouts, where it’s safely discharged. A gutter without this slight incline is likely to overflow, creating a breeding ground for debris and potentially causing damage to your home or roof.

Professional installation safeguards against this type of problem by ensuring that the gutter’s pitch is accurate. Generally speaking, a gutter slope of one quarter inch for every ten feet of length is sufficient to ensure effective drainage. However, there are a number of factors that affect this exact figure, including the structure and design of your roof, the gutter’s required length, and where downspouts will be placed.

For an accurate calculation of your gutter’s desired slope, begin by marking a line with a chalk line on the fascia board where the gutter will be attached. Next, use a tape measure to mark another point 10 feet closer to the downspout on your house’s eaves. The difference in the marks is the gutter’s desired slope.

During installation, the professionals will adjust the gutter’s incline by placing hangers along the length of the gutter run and fastening them to the fascia using corrosion-resistant screws. These hangers will raise or lower the gutter as necessary to achieve a consistent slope from end to end. This step is particularly important near corners or other bends where the gutters must follow a curved path. A lack of consistent slope throughout the gutter run will result in standing water, which can lead to sagging and increase the risk of ice dams during winter.

Downspouts

The downspouts installed during gutter installation are essential to preventing water damage by directing rainwater away from the foundation of your home. If your downspouts clog, you may notice water pools in the soil surrounding the house or even see watermarks on basement walls after heavy rains. Having sufficient downspouts is also important to keep your home’s foundation protected from the moisture that can lead to cracking and crumbling over time.

The number of downspouts installed should match the size of your gutter channel. Generally, each downspout should be spaced 30 to 40 feet from the gutter channel to avoid clogging and overflow. The right amount of downspouts can be determined with simple calculations based on roof area, slope, and rainfall intensity.

You can choose from square downspouts that offer a modern aesthetic and come in a range of sizes for customization or round downspouts that are traditional and more effective at directing rainwater. You can even buy downspout extensions to extend the length of your downspouts so that it carries rainwater further away from your foundation before draining into the soil.

You should inspect your downspouts regularly to ensure they are functioning properly. During your inspection, you should check for signs of rust and any cracks or gaps. If you do notice any problems, you should contact a professional to repair them before they become worse. You can also use a sealant to patch any minor leaks that occur in the joints of your downspouts. You should also re-tighten the screws on downspout brackets that loosen from heavy rain or wind. The re-tightening of these bolts can prevent downspouts from becoming sagging or disconnected from the gutter.

Materials

Gutters are crucial to a functioning home, directing water away from the foundation and protecting against soil erosion, basement flooding, and rot. Proper gutter installation and regular maintenance help ensure that they function as intended.

Gutter installation begins with a thorough inspection of the existing system and determining the number and placement of downspouts. This step helps determine the proper slope of the gutters and prevents overflow during heavy rainfall.

Next, the installer marks the slope of the gutters by using a chalk line along the roofline. This guideline is used as a reference for placing gutter hangers and ensuring a consistent slope throughout the entire system. Once the slope has been marked, the gutter sections are installed, starting at the highest point of the roofline and working downward.

After the gutters are installed, downspouts are positioned in their desired locations. Downspout outlets should be placed at the lowest points of the gutter slope to allow for optimal water flow and to prevent pooling.

The type of gutter materials also plays a role in the overall durability and appearance of the gutters. Some options include aluminum, galvalume (galvanized steel coated with 55% aluminum and 45% zinc), copper, and vinyl. Each offers different levels of durability and a unique aesthetic. Aluminum gutters are lightweight, rust-resistant, and affordable, while copper offers increased strength and a classic look. Galvalume and copper are durable against harsh weather conditions, such as ice, hail, and wind.

Lastly, a caulking gun and screws are used to secure the various gutter components together, ensuring that they are watertight and leak-proof. These tools, in addition to a tape measure and ladder, are essential for accurate measurements during the gutter installation process.

Timeline

A gutter installation timeline is impacted by many factors, including home size and roof structure complexity, along with weather conditions and contractor availability. Understanding these influences can help homeowners set realistic expectations for their projects. Additionally, executing these projects during optimal times of the year can expedite the process and ensure that the project is completed with minimal complications.

When considering a new gutter system, the timeframe can range from a few hours to several days, with larger homes and intricate roofing structures lengthening the installation process. Hiring a professional contractor ensures proper alignment and secure installation, reducing the risk of leaks and future issues.

In addition, contractors can add accessories and downspout extensions to enhance the performance of your gutter system. These features reroute rainwater away from foundations, preventing water damage to the home. Finally, the timeframe for installation also depends on the location of the gutters and whether they require custom parts to create a seamless flow of water around the structure.

The steepness or pitch of a roof can also impact the timeframe, as it requires more labor to maneuver on the roof and take extra safety precautions. Gutter materials also factor in, as more durable, heavier materials are often required for large properties or multistory homes.

A thorough site assessment and measurements are conducted, and appropriate materials are chosen based on the home’s size and style. Gutter sections are then fitted and secured to the home’s roofline, with downspouts added to redirect rainwater and prevent water pooling in areas that can lead to rot or mold. Once the installation is complete, the site is cleaned and debris is removed. The final inspection and cleanup step helps to ensure that the job was completed properly and efficiently.